Enabling Fail2Ban
Once you have installed Fail2Ban, it needs to be enabled to start protecting specific services (daemons) of your server, so please follow these steps to enable it.
- Log into Plesk via https://XXX.XXX.XXX.XXX:8443 (the X’s represent the IP address of your server).
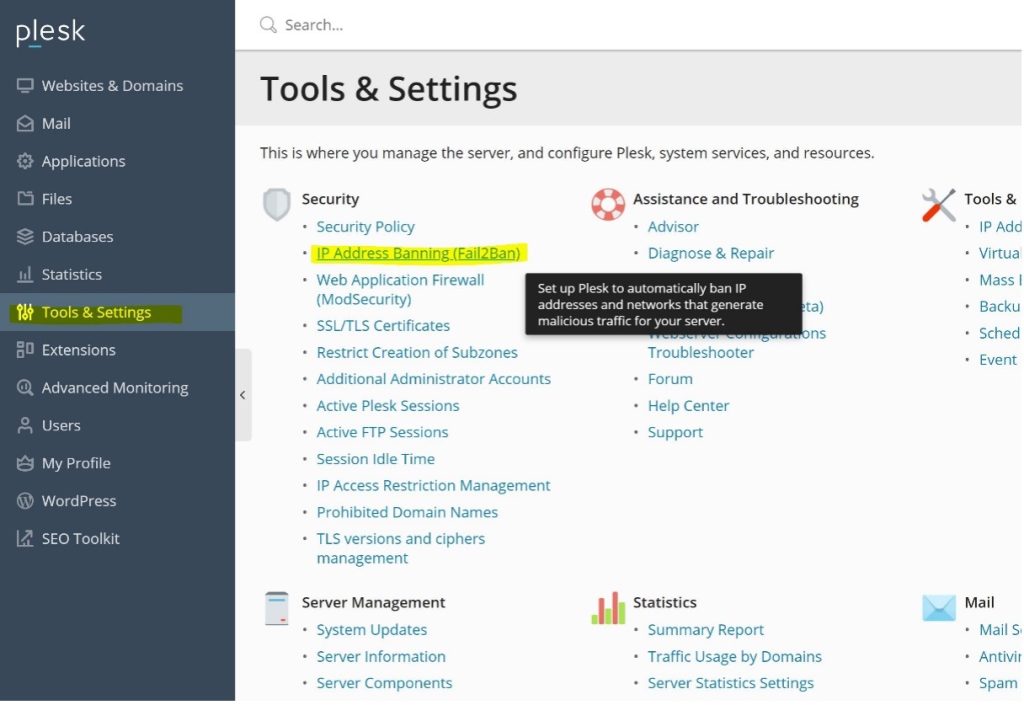
- Click on “Tools & Settings” on menu on the left-hand side.
- On the Security section, click on IP Address Banning (Fail2Ban) as shown in the pictures below;

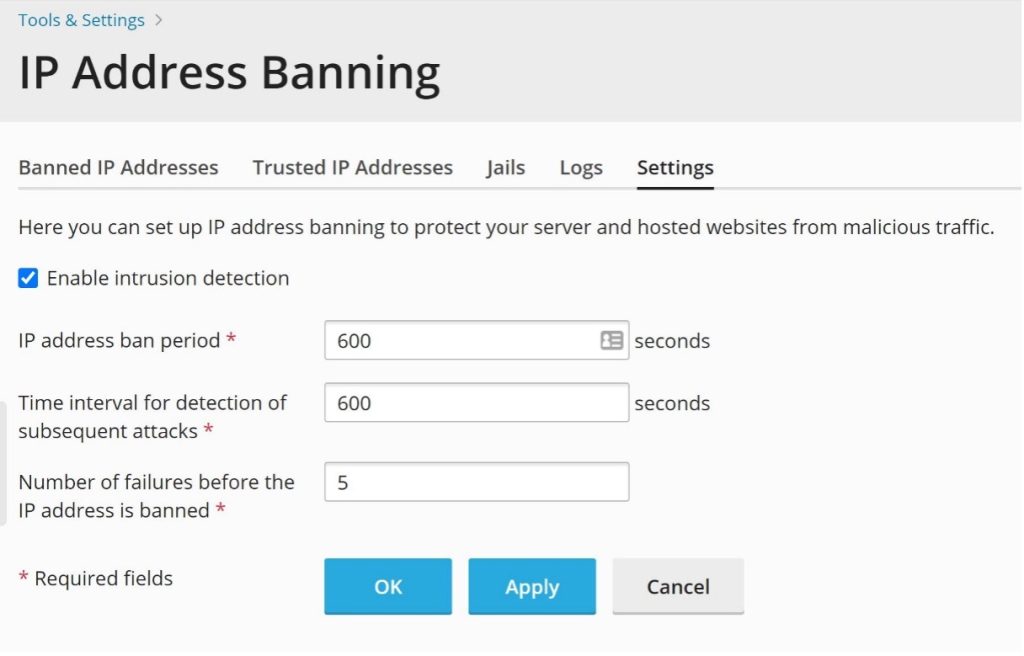
To enable Fail2Ban you just need to click on “Settings“, select “Enable intrusion detection“, and click on “OK”.
On the same page, it is also possible to customise some settings, such as ban period and the number of failures before the IP address is banned, as you can see on the following screenshot;

To check on Fail2Ban activity, you may need to analyse its log file from time to time, which you can reach and download via the Plesk GUI, as you can see below;

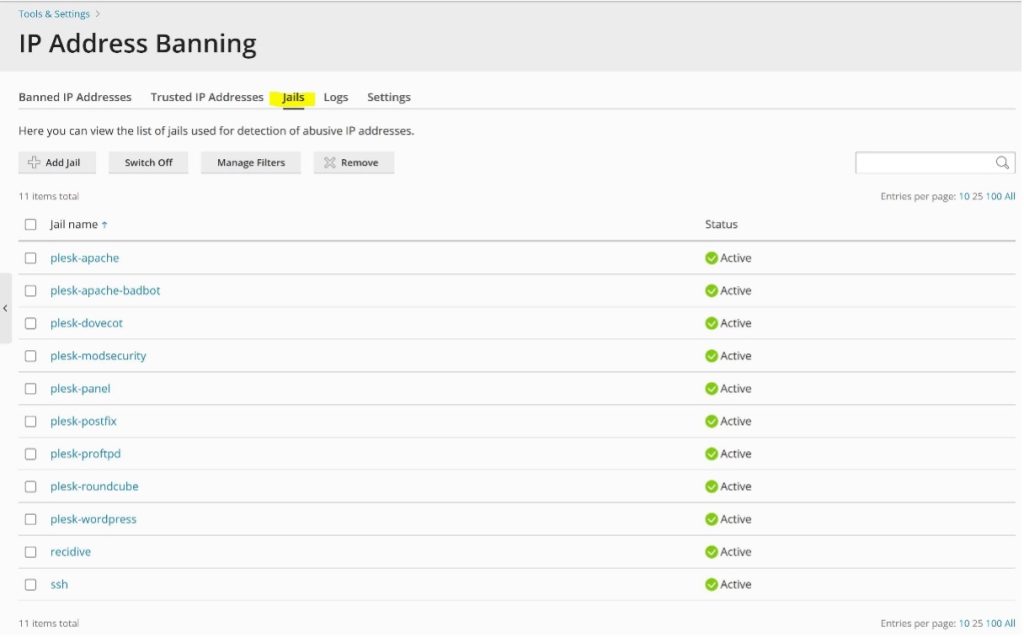
Tip: You may want to take a look at the Jails menu before enabling Fail2Ban. Through Fail2Ban Jails menu, you can configure Fail2Ban whether to monitor a specific service or not, so you could disable one or more of them for instance

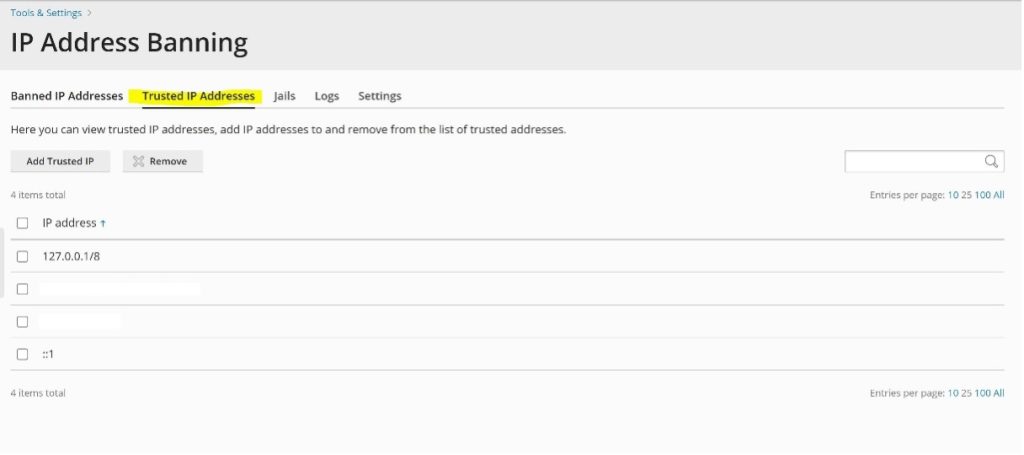
Tip: You may also want to add some IP addresses to the Trusted IP addresses list, so they will not be banned by Fail2Ban. This may be useful if some users of your network have a wrong credential set on their email client for example, so their IP address is likely to be block after a certain number of failed attempts to login.

Get in touch
If you need advice on Fail2Ban, we’re here to help.
Call us on 0333 247 0222: Monday – Friday, 9am – 5.30pm.
Chat with us on LiveChat: Monday – Friday, 9am – 5.30pm.
Write to us: Send us a support ticket from your Simply portal and we’ll get back to you as soon as we can.
If you don’t have an account with Simply Hosting yet, you can also send our Sales team an enquiry and we’ll get back to you between 9am and 5.30pm, Monday to Friday.


